
Honestly, the whole thing makes me sweat. I’m not a “collector.” I’m someone who makes things—awkward pottery, big messy paintings, weird assemblages of wood and wire that my family calls “interesting.” And for years, my storage system was a tragic joke. The attic. The back of the garage. Under the bed. I’d pull out a painting and find a ghostly outline of a spiderweb etched into the varnish, or a bowl with a fine crack I didn’t put there. It felt like a slow, quiet betrayal by my own house.
So I started asking real people—a framer I trust, a sculptor friend who ships her work globally, a grumpy but brilliant guy who restores paintings for a living. I cobbled together what they told me, mixed it with my own disasters, and here’s the raw, non-googleable truth.
Forget “storage.” Think “Hibernation.”
You’re not hiding your work. You’re putting it to sleep in a way that lets it wake up unchanged. The goal is to push pause. That’s it.
The biggest lie we believe? That a clean, dark room is enough. It’s not. Temperature is the brute; humidity is the assassin. Humidity is what curls paper, makes canvas go slack, coaxes mold out of nowhere. You can’t fight it with a box of silica gel. You need a real, honest-to-goodness climate-controlled space. Not a basement that’s “pretty dry,” not a spare room. A space where the air is mechanically kept consistent. That’s the hill to die on.
Packing. Let’s get physical
This part is oddly satisfying. It’s the last care you give the piece before its nap.
- Canvases: That thin, cheap plastic wrap from the moving store? It’s murder. It sticks to paint and traps sweat from the air. I ruined a small study this way—the plastic fused to an impasto stroke. Now I use glassine. It’s this silky, non-stick paper. I tape a sheet of it right over the face to the back of the stretcher bars. Then I bubble wrap. Corner protectors on the frame or the stretcher bars are not optional; they’re gospel.
- Paper (drawings, prints, watercolors): Acid is the enemy. Regular cardboard and tissue are acidic and will slowly burn a yellow stain into your paper over time. It’s heartbreaking. You need acid-free folders or archive boxes. They’re not that much more expensive. Sandwich the piece between sheets of acid-free tissue, put it in a folder, and stand it up in the box. Don’t lay it flat under a pile of books.
- 3D Stuff (clay, wood, mixed media): Your enemy is pressure and vibration. You have to immobilize it. Crumple plain newsprint (not the shiny ads) or use biodegradable packing peanuts. Fill every cavity. Nest it in a box that’s way bigger than it needs to be, with padding on all sides. Mark the box in giant letters: “FRAGILE – LIKE, SERIOUSLY.” And always, ALWAYS, draw a diagram of what’s inside and which way is up on the outside.
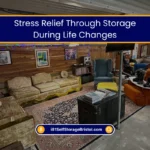
Inside the Unit: The Tetris That Matters
You can’t just shove boxes in. Here’s my method, born of pure panic when I had to retrieve one piece from a stacked wall of identical boxes.
- Get it off the floor. Concrete sweats. Pallets are your best friend. If you can’t do pallets, those interlocking foam floor mats work. Create a moisture barrier.
- Leave a walkway. I leave a foot of space down the center of my unit. It’s a “sacrificial” aisle. It feels wasteful until you need to get to the box in the back without moving the entire universe.
- Shelving is sanity. Wire shelving is cheap and lets air circulate. Put your most sensitive pieces (paper, textiles) in the middle, not against an exterior wall.
- Cover with cotton. A breathable cotton sheet or drop cloth over everything as a final layer catches dust. No plastic tarps. They create a mini-sauna.
The Unsexy, Critical Step: The Paper Trail
Before you seal a single box, take pictures. Not just one. Get the corners, the back, the signature. Open a note on your phone or a cheap notebook and write it down. “Blue Vase, 2023, stoneware, hairline crack on base (pre-existing).” This isn’t just for insurance (though, for god’s sake, call them and make sure your art is covered off your property). It’s for you. In two years, you will forget what’s in Box #4. This list is your memory.
Why This All Led Me to Renting a Real Unit
After my garage-rot disaster, I was desperate. I needed a place that was designed for this. That’s how I found Bristol VA Self Storage. I’ll be straight with you—I’m mentioning them because they solved my specific, artist-level panic attack. Their units are bone-dry, the temperature never wobbles, and the security is visible. It’s not a creepy, flickering-light hallway. It feels clean and monitored. I can sleep at night. I think of it as renting a tiny, ultra-secure wing of my own studio. It lets me make more work because I’m not anxious about the work I’ve already made.
The Real Talk Conclusion
This isn’t about paranoia. It’s about respect. You fought for these pieces. You solved visual problems on them, cursed at them, loved them. Storing them properly is the final, quiet act of that love. It’s saying, “Your work here is done. Rest now. I’ll come get you when it’s time.”
Then you close the door, lock it, and go back to your empty, waiting studio. The best protection for your old art is making your new art. And you can’t do that if you’re worried about the stuff in the attic.
Now go make something. The storage part is handled.


0 Comments